How to Effectively Use Retention X-Ray AI for Customer Retention
Retention X-Ray AI is a powerful tool that helps brokers manage renewals, identify high-risk policies, and improve customer retention. This guide walks you through setting up and using the tool to maximize its benefits.
Step 1: Access Retention X-Ray
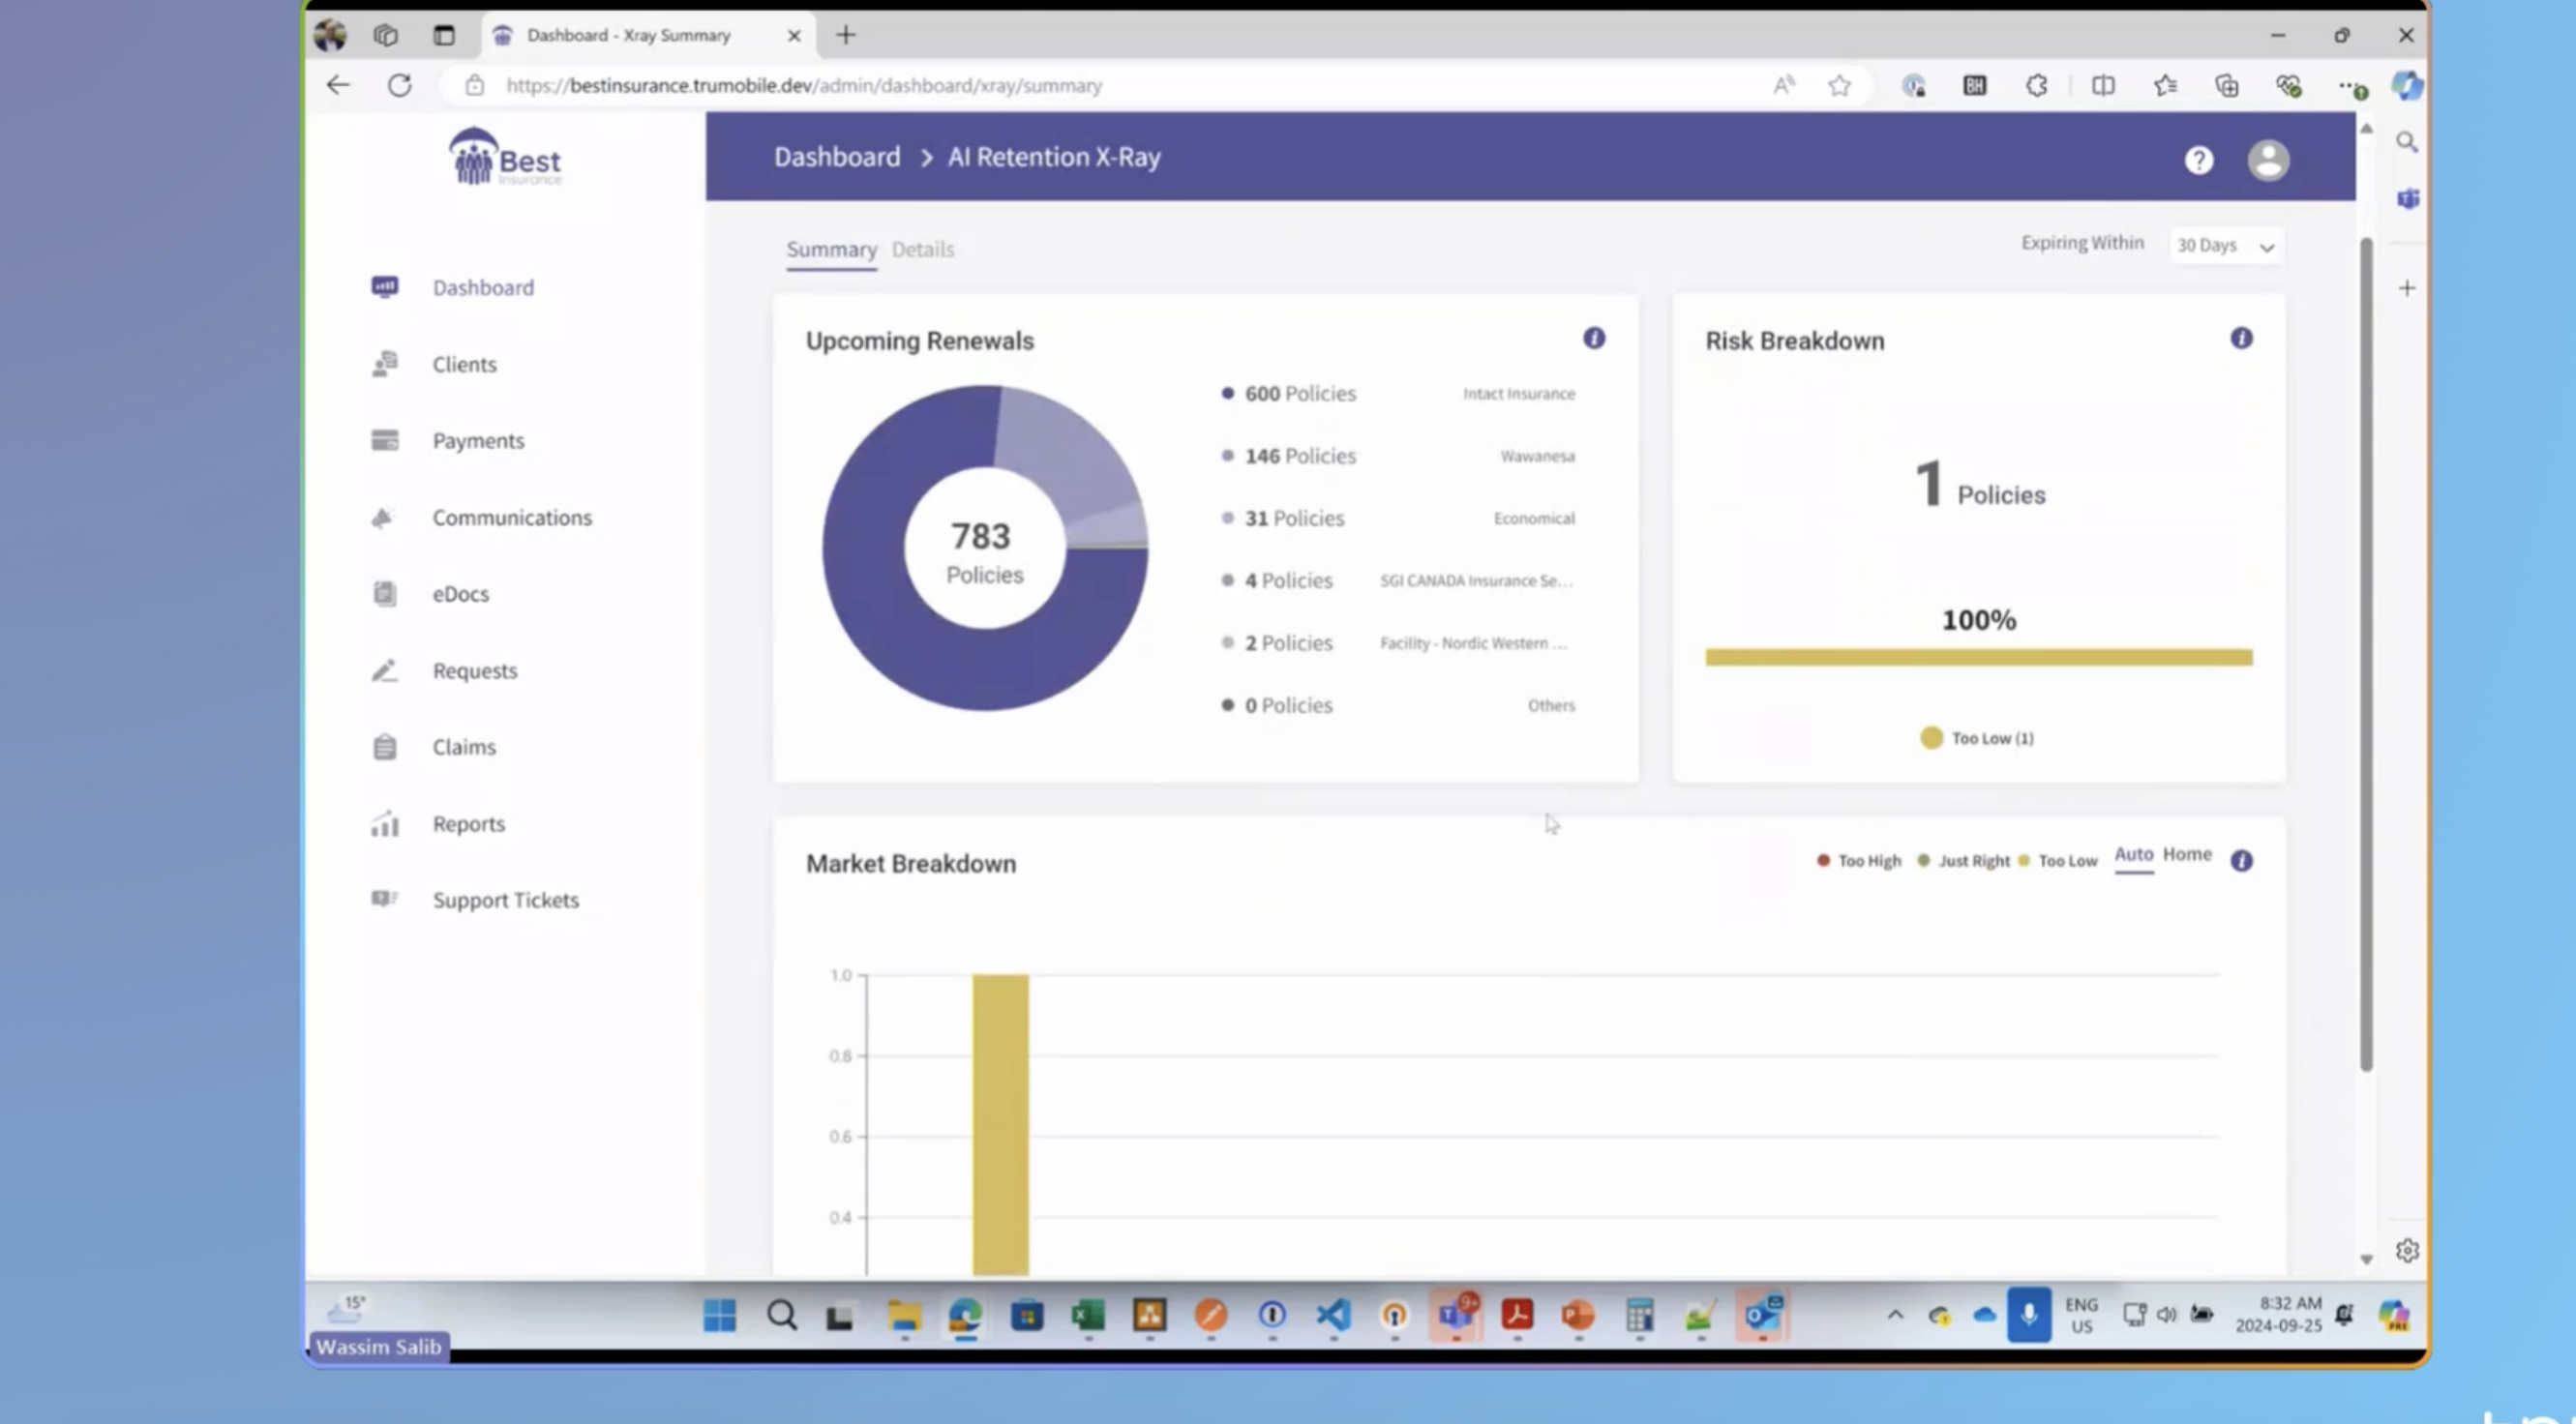
To begin, navigate to the Retention X-Ray feature from your dashboard. This can be found under the “Data Hub” section in TruMobile.
- Dashboard Overview: You’ll see a summary of all policies, including those up for renewal in the next 30 days. You can adjust the timeframe to 60 or 90 days as needed. The overview helps brokers get a snapshot of their business.
Step 2: Filtering and Understanding Predictions
Once in the Retention X-Ray dashboard, you’ll see a list of policies with a “confidence score” and renewal predictions. The confidence score indicates how confident the AI is based on similar data it has processed, not the accuracy of the prediction.
- Default Filters: The system defaults to showing policies with a confidence score of 60 or higher, which is a sweet spot for valuable predictions. It also focuses on policies renewing in the next 30 days. You can modify these filters based on your brokerage’s specific renewal process (e.g., changing the renewal window to 45 or 60 days).
- Confidence Score: This score shows how much the AI has seen similar cases, not the accuracy percentage. For common policy types (like standard auto insurance), the AI is more confident. For rare cases (like a collectible car), the confidence may be lower.
Step 3: Customize Filters
You can further narrow down your policy list using additional filters:
- Market Indicator: Use this to identify policies with higher risk based on premium increases.
- Claims and Convictions: Filter out policies where claims, tickets, or risk changes explain premium increases. This lets you focus on customers whose premiums have increased without logical cause, giving you a targeted list of potential remarketing opportunities.
Step 4: Save and Manage Your Filtered List
Once you have applied the necessary filters, you can save the list for future use. This is useful for managing your monthly renewals or tracking high-risk policies.
- Save Your Filtered List: Save the filtered list under a specific name, such as “Monthly Remarketing List,” to avoid reapplying filters each time.
- Marking Tasks: You can flag each policy as “done” after reviewing or remarketing it. This keeps your workflow organized and allows you to track which policies have been addressed.
Step 5: Automate Communication
Once your list is prepared, you can automate sending emails or notifications to customers using the integrated messaging feature.
- Select Email Campaigns: Choose from predefined templates or create a custom campaign to notify clients of policy renewals or premium changes.
- Campaign Scheduling: You can schedule email campaigns to run monthly, weekly, or at any interval that suits your business process. This automation saves time and ensures consistent communication with your clients.
Step 6: Monitor and Update Campaigns
Once your campaign is live, you can monitor its progress, adjust as needed, and even deactivate campaigns temporarily if necessary. You can also manually trigger a send if the automated schedule is delayed or missed.
Best Practices for Brokers
- Focus on High-Risk Clients: Use the confidence score and premium changes to identify clients most likely to shop around. These are your priority for remarketing efforts.
- Save Time with Automation: Automating client communications ensures you don’t miss out on retention opportunities, especially for high-risk policies.
- Customize Your Filters: Every brokerage has different needs. Work with your team to determine the filters that will yield the best results for your retention strategy.